An image oseveral attempts acreating a whisk prototype and mode

Background

Industrial Product design —a case study from concept to presentation, looking at the multidisciplinary process of industrial product design. The goal of this project to explore the occupation of industrial product design. I will accomplish this goal by researching and the going through that process to create a feasible product. This project will touch several categories of multi-discipline study these include —design thinking, human-centered design, sustainability, illustration for product design, rendering in 2d and 3d, prototyping, modeling, and presentation.

an animation the various types of whisks
Throughout this site, I will be talking about the development of a kitchen whisk. The whisk is the muse or the vehicle to talk about the industrial product design process.

In order to prevent getting lost in the myre of complexity it will be vital that I strive to keep the end product as simple as possible, sticking to simple shapes and form. This project will end with the presentation of digital illustration, technical drawing, and a proof of concept model, at which point in the actual realworld workflow the project would either be sent back for refinement or moved on to further development.


an image of the books used for research in this project.

Research

8 minute read-time

The research portion of the process no matter what design occupation may be the most important and most critical activity that will determine how successful the solution outcome will be for the entire project.


For this project, I am looking at some giants of design, people who have shaped our thought about design as well as the world we live in and will be applying some of their approaches to design to my process.


The next section of the research is product specific, I wanted to find out the history of the product in this case the kitchen whisk. Where were the innovation divergences if any? Who uses it? For what, and what is their experience with using it? My assumption is that people with limited mobility due to age or injury might be struggling with the whisking task, robbing them perhaps of some of the joy of the cooking experience or at the least making it uncomfortable and unpleasant and at orse a painful activity. How can Industrial Product Design help solve these problems?


an animation the various types of whisks

We will begin with Deiter Rams. Rams having spent over 50 years designing products at BRAUN, has developed his 10 principles of good design.

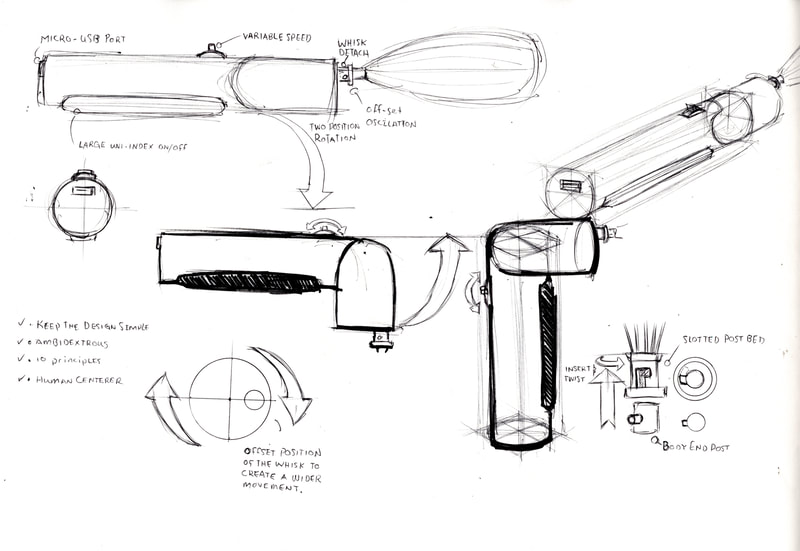
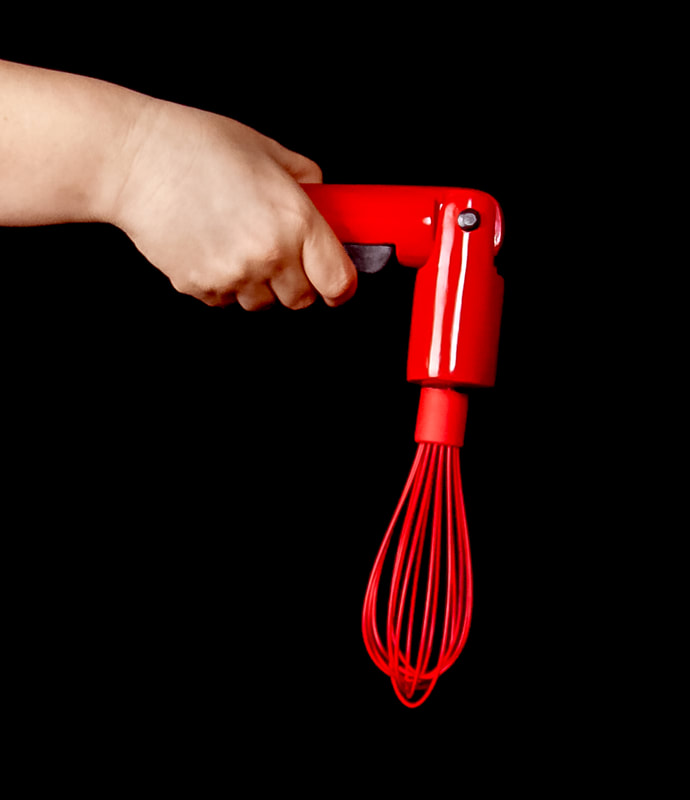
As I explore the industrial design process, through the lens of developing an ergonomic power-assisted whisk that helps people with age or injury-related mobility and pain issues engage in this simple but often exhausting cooking task, I will be applying Deiter Rams’ design principle to that process.


A product must be innovative —there has been very little to no change to the design of the whisk since Julia Child introduced it to the world in 1964. Except for attachments to immersion blenders and the whisk has remained unchanged, a static manual tool.

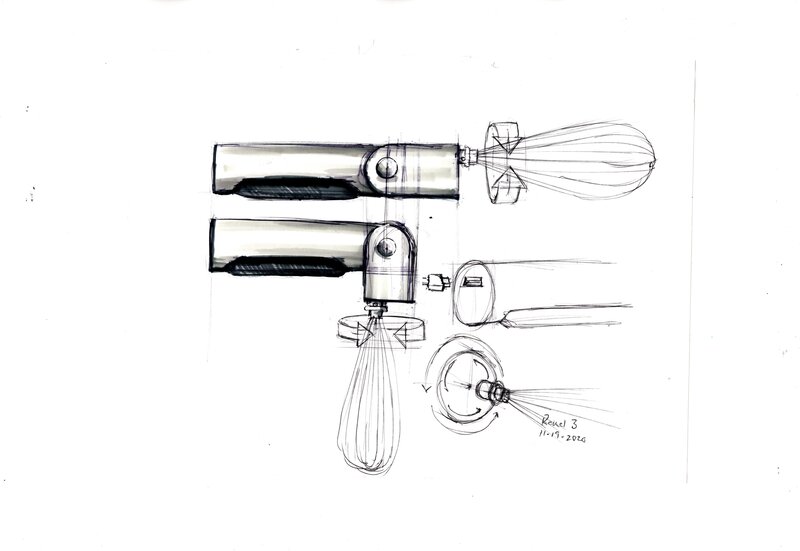
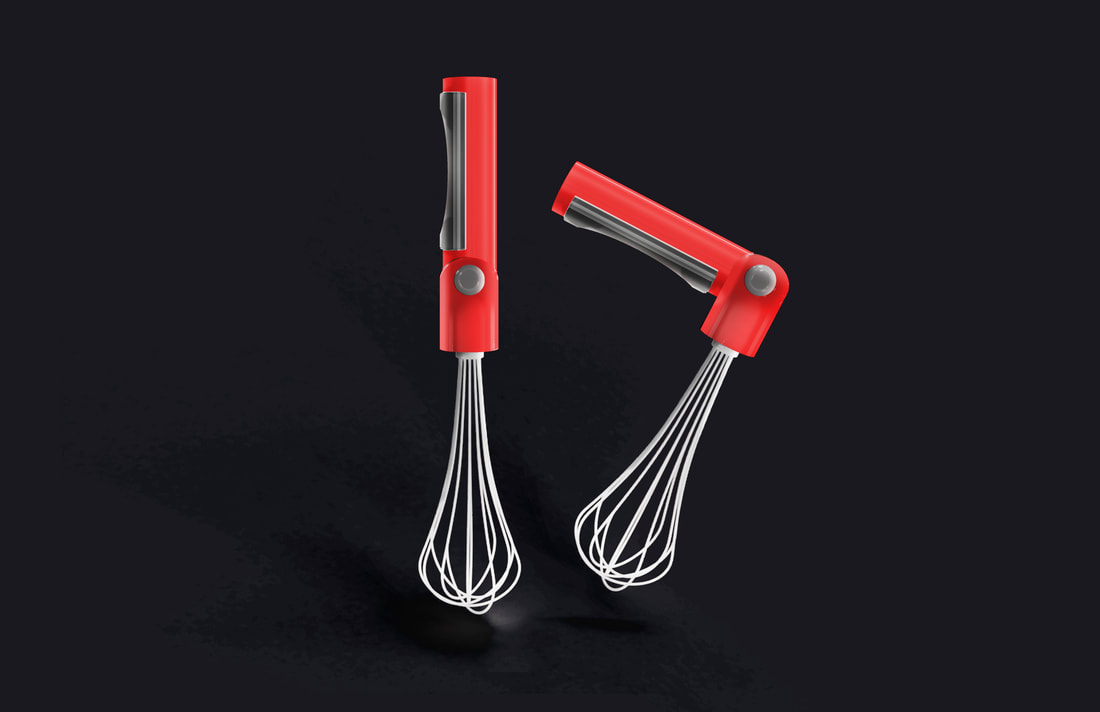
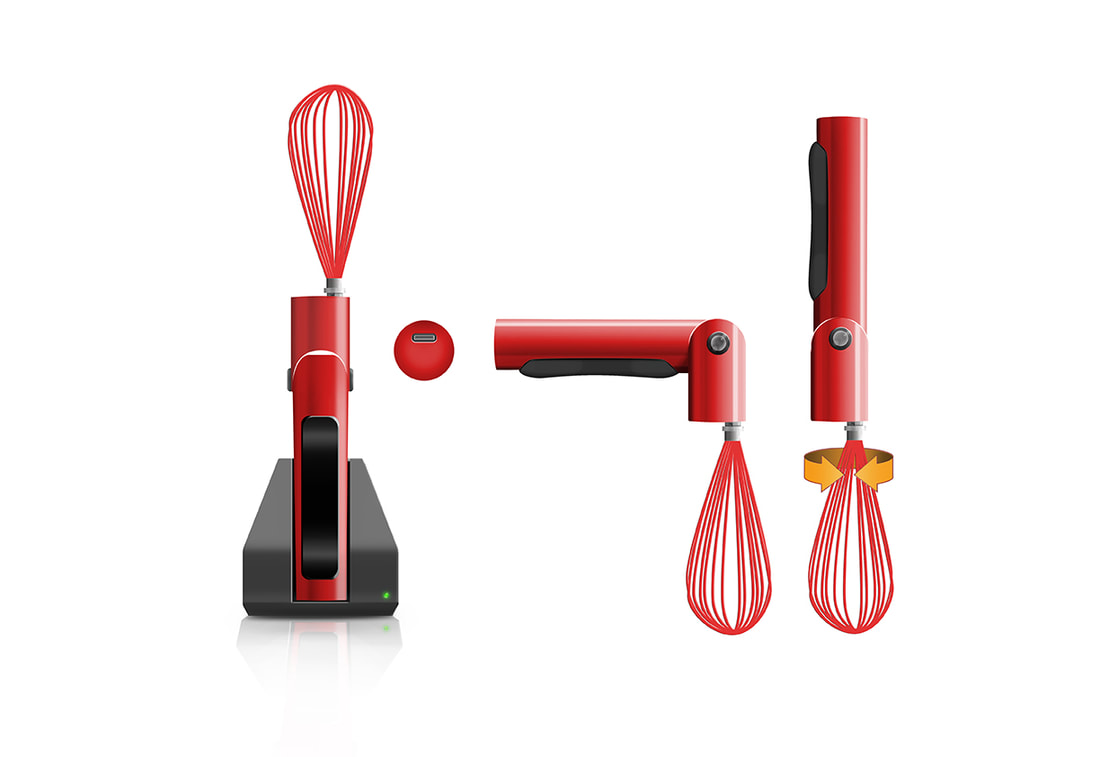
A product must be aesthetic, understandable, unobtrusive, honest, and as little design as possible—using simple geometry and color will allow the product to be easy to understand and operate. The simple shapes and lack of gimmicks should let it sit quietly when not in use.

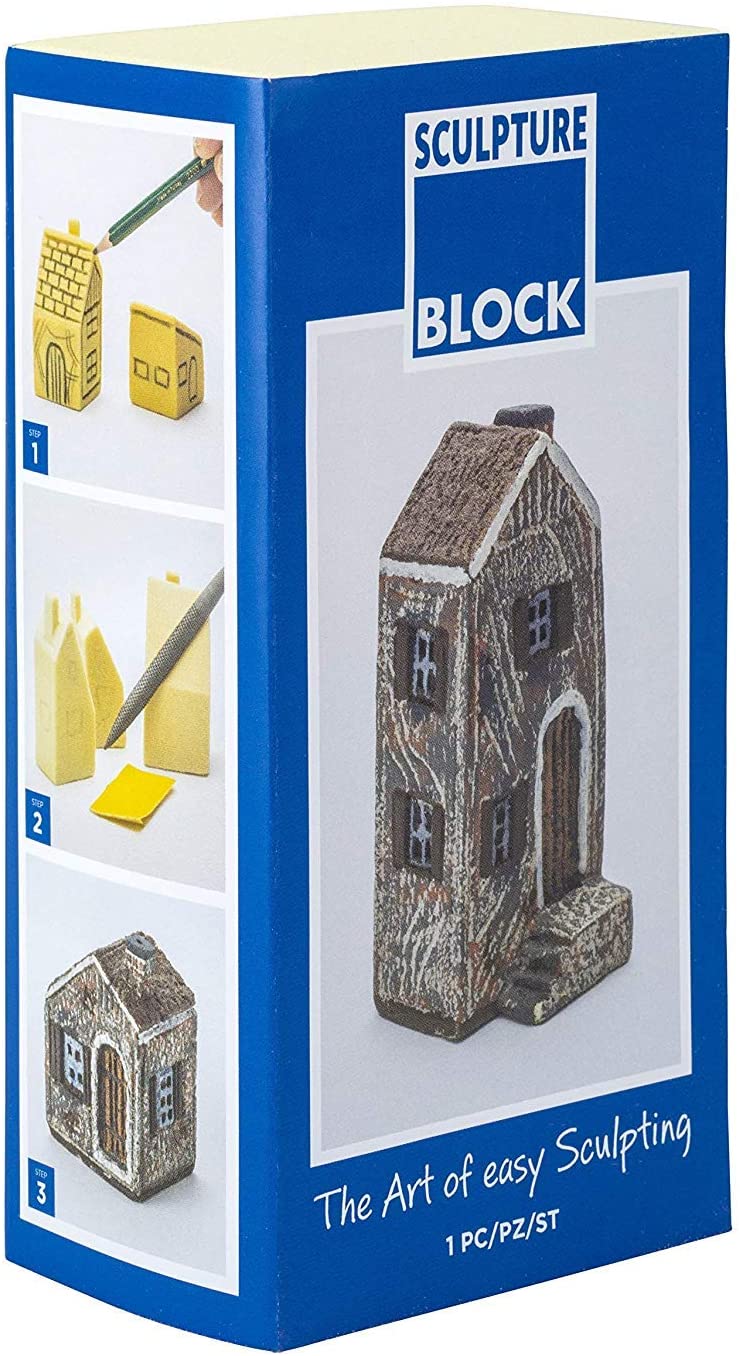
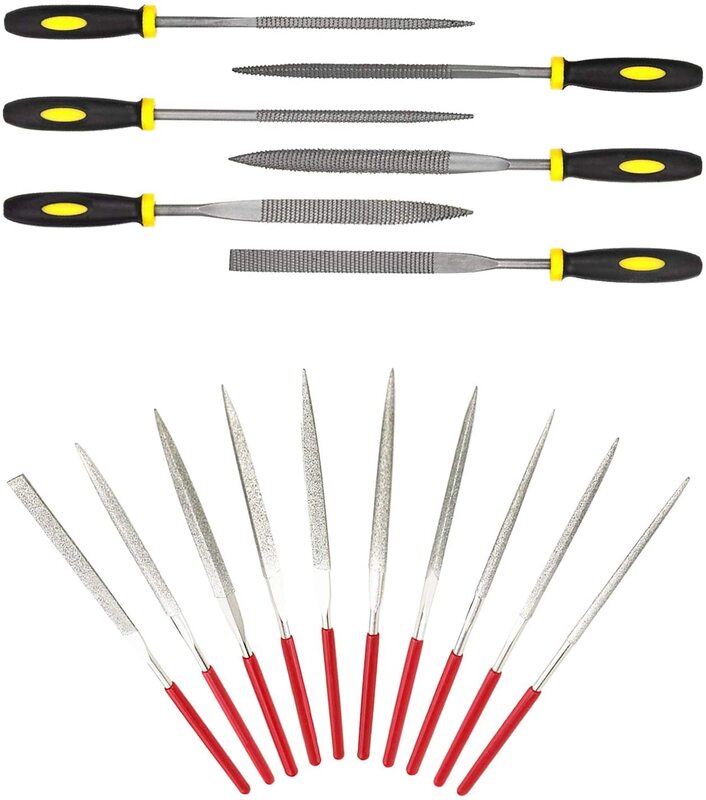
Thorough down the last detail and long-lasting —this principle informs everything you do within the process. Understanding the design means spending time with it through the exploration of sketching and ideation. Only through this process can one begin to understand the product. How all the pieces fit together, what’s needed, what isn’t. How it fits in the hand, is it a couple of millimeters too large? Does it communicate with the user well? Is it effective for its purpose? When one can satisfy these questions the product has a chance at standing the test of time because a product that lasts is a product that works.

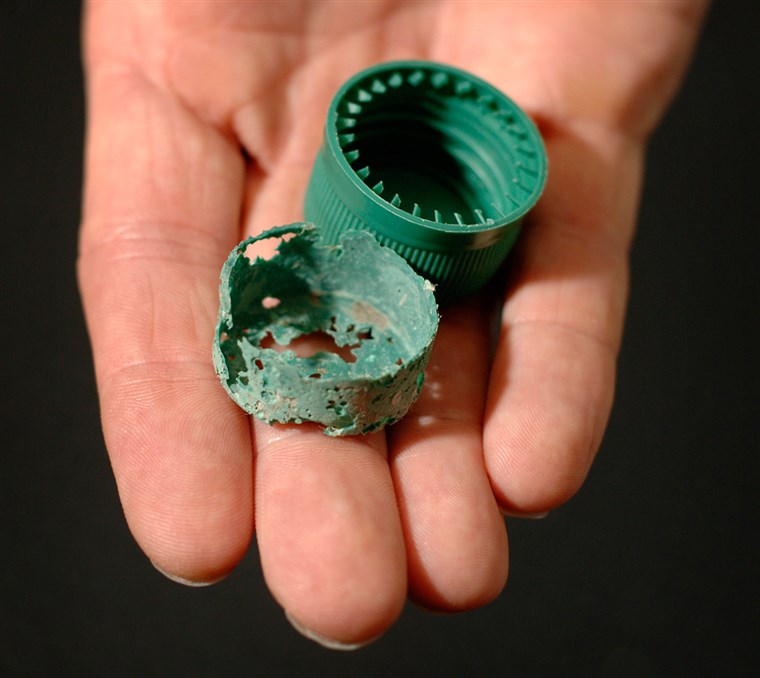
Environmentally friendly —Creating sustainable products that do not harm is more important today than ever and there is great research being done with bio-degradable bio-plastics that I will suggest being applied to my product this application would not only be a feature of the product but also vital to us all.


A portrait photograph of Don Normans

Don Norman’s Human Centered Design looks at the different ways that humans approach and think about objects. Our interactions are based on our life experience, through this training we learn how things work and what to look for to interact with objects in our environment this happens on a conscious and subconscious level. I will be using affordances, signifiers, and conceptual models for the development of my product.

Affordances —are what allow an object to function as it is intended. For example, a pencil sharpener works because there is a pencil-sized hole for the pencil to slide into to access the cutting apparatus that sharpens our pencil. The hole affords the pencil access to the blade.

Signifiers —lets us know how to interact with the object. The pencil-sized hole in the pencil sharpener signifies that this is where the pencil goes to be sharpened. If you are an alien visiting our planet and had never used a pencil sharpener you may need additional signifiers such as an illustration of the pencil in the hole. Because we are not aliens and have a lifetime of experience with the pencil sharpener we don’t need the extra-illustrated signifier. Our life experience has informed our knowledge of the pencil sharpener, we know the pencil goes into the hole without thought. This is a —conceptual model Our life experience activated from our subconsciousness tells us how to use the pencil sharpener.


A portrait photograph of David Kelley of IDEO

David Kelley, the co-founder of IDEO is an innovator and originator of the “Design Thinking” approach to design. Emphasizing empathy of your audience needs, quick thorough design ideation practices, and rapid prototyping.

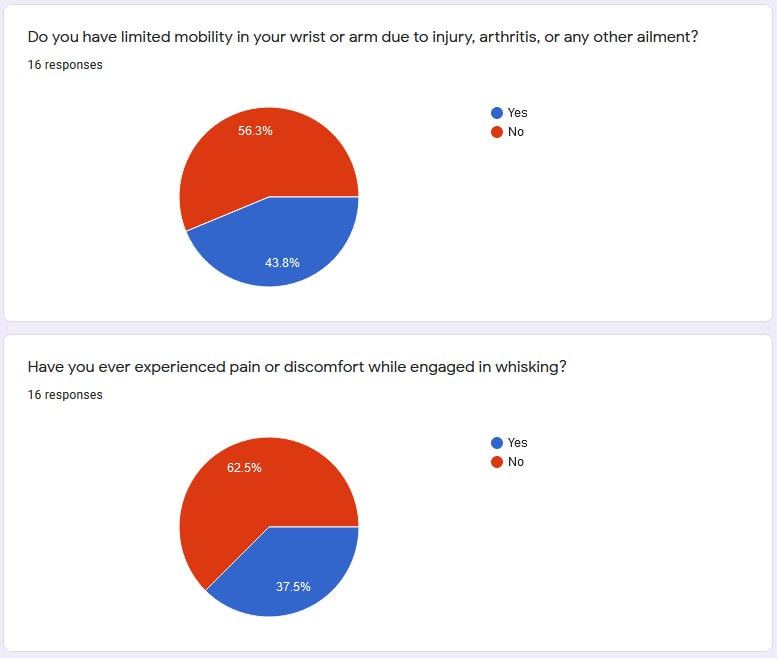
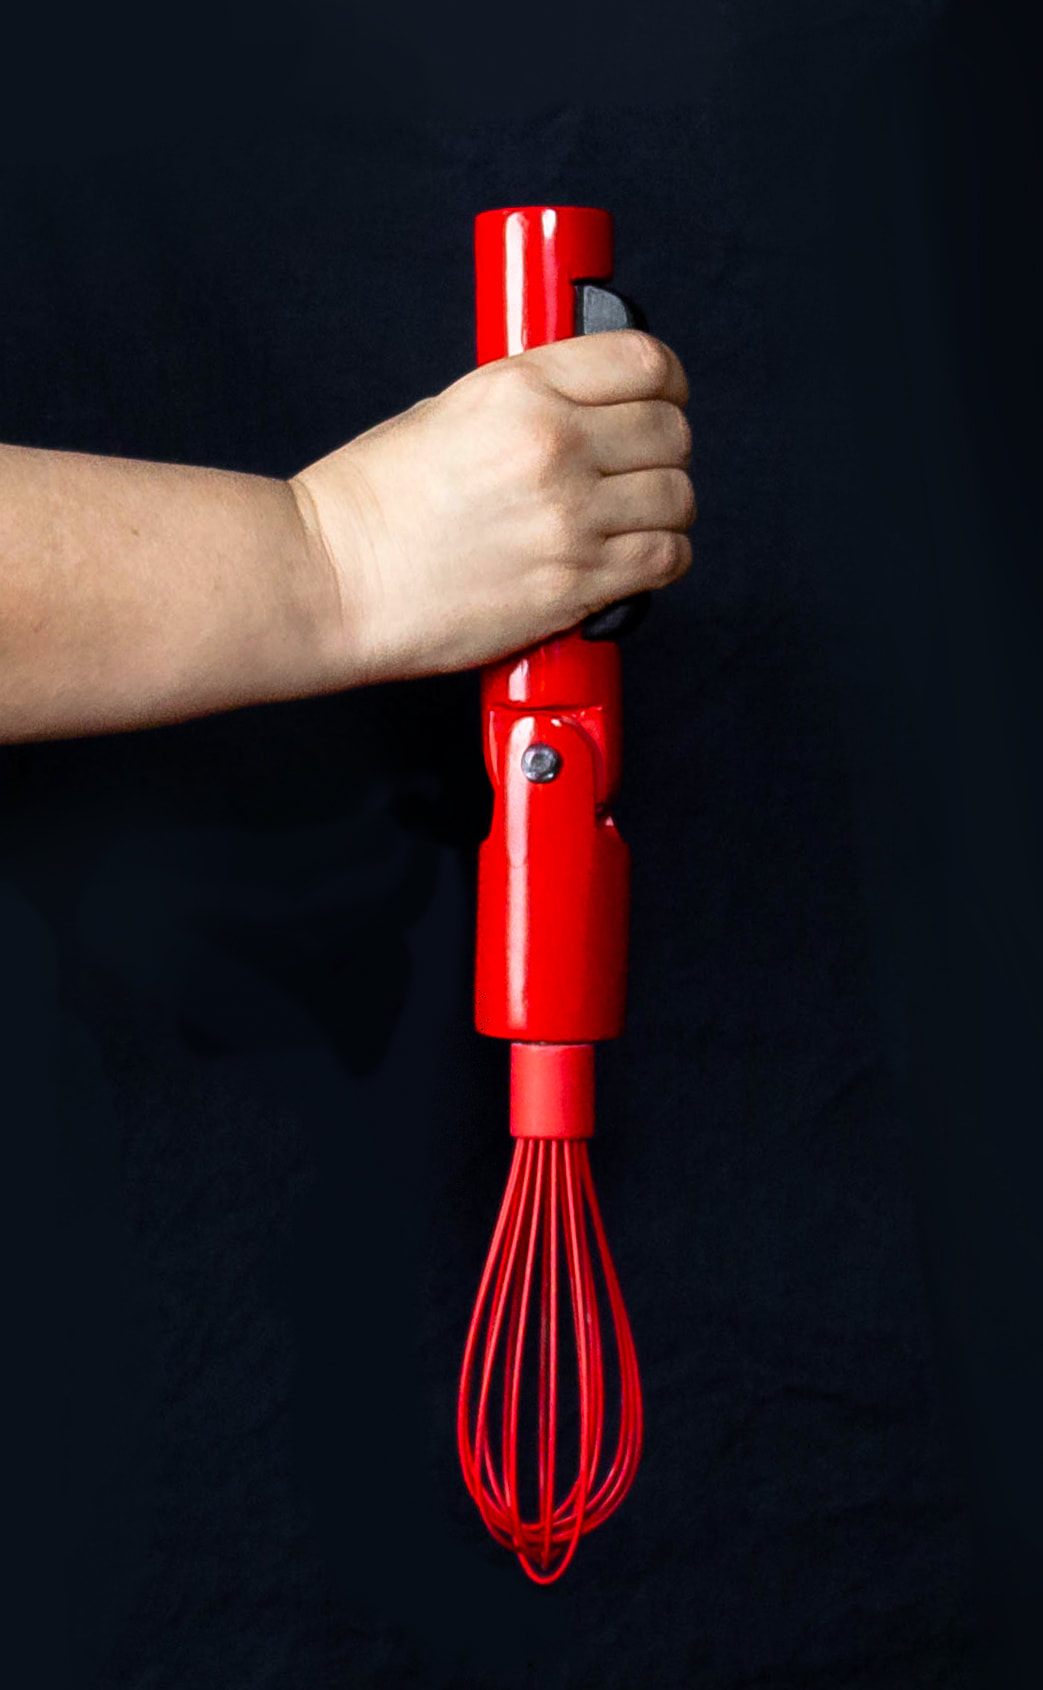
Empathizing —taking a close look at the needs of the audience and asking questions; let us consider limited mobility, injury and chronic pain, and the task of whisking. I have learned through my research that three-quarters of the people surveyed experience pain in their hands or wrists. 80% of the same people say they would do the whisking task despite the pain or discomfort. Some questions to consider. Where is it causing problems, is it more difficult than it needs to be? Is it tiring? Does it cause pain? Learning what the existing products' pain points inform the design decisions to help create a product that is more effective easier to use and hopefully a more enjoyable experience for the end-user.

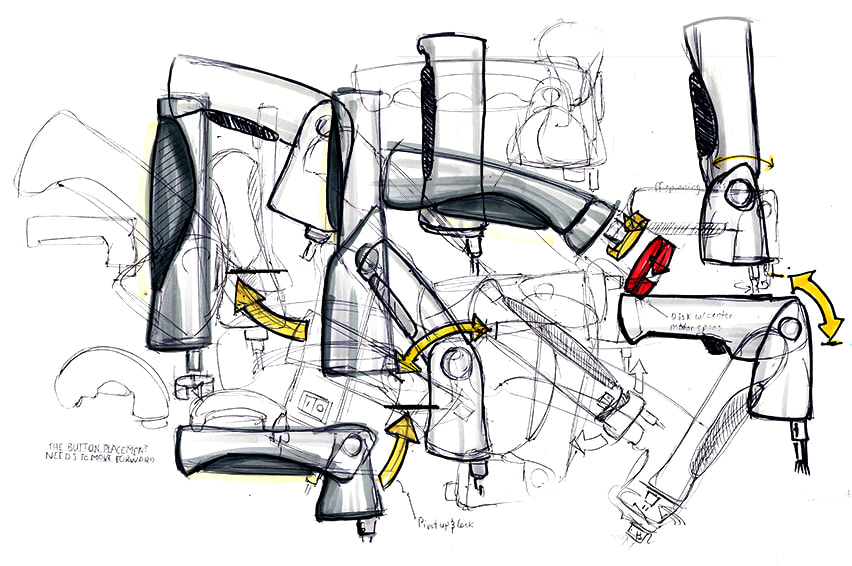
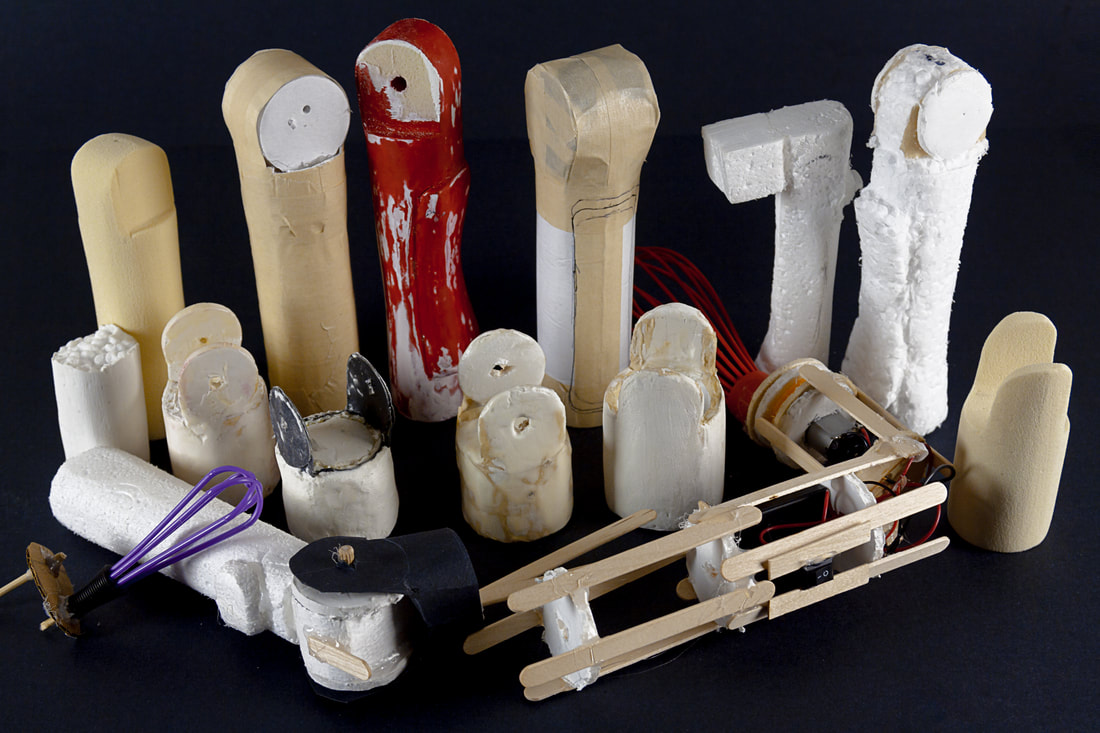
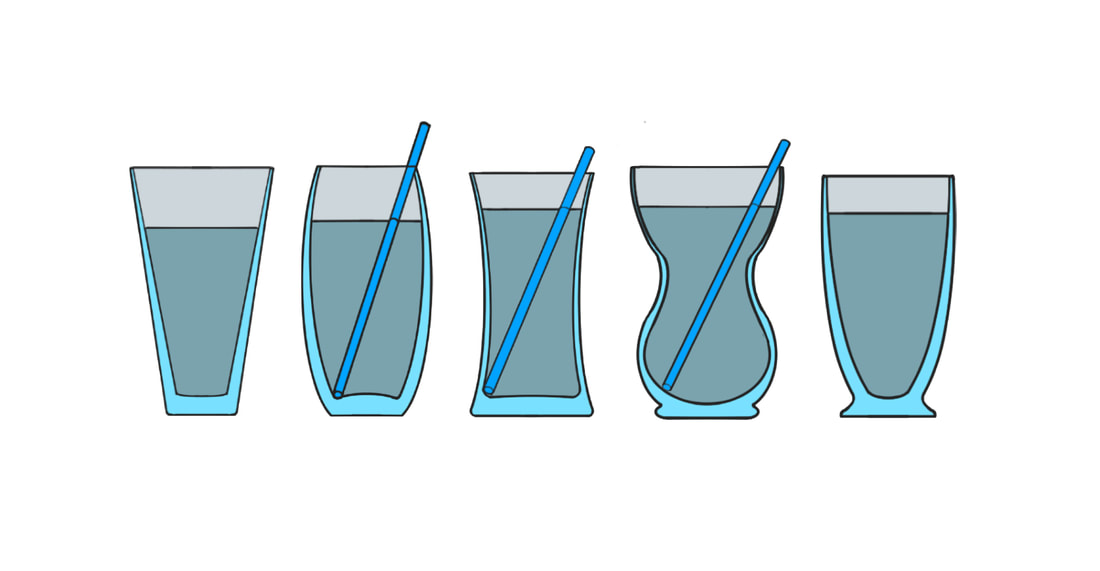
Ideation —what's another way can I do it? Come up with many ideas based on the learnings from the information gained through empathy. Here it is important to thoroughly explore even the bad ideas may in the end lead to something unexpected.

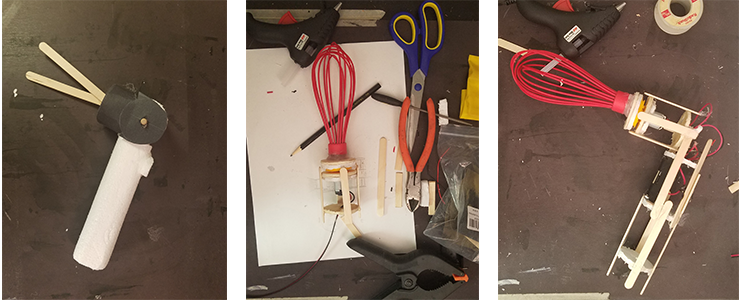
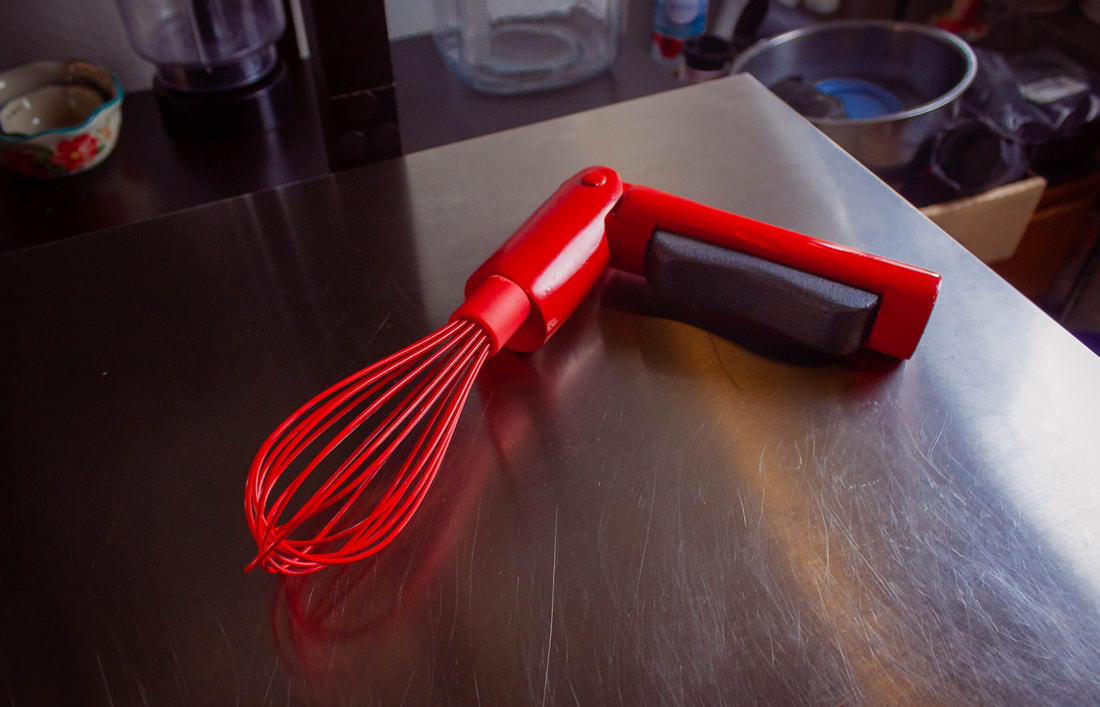
Rapid Prototyping —working in concert with ideation quickly creating a simple prototype of your product to find out if your assumptions are true —what’s working and where more attention needs to be placed. The cycling between ideation and prototyping serves to hone in on an effective functional design and one that is thoroughly considered down to the last detail.


Choose the Product —While considering this project —the exploration of industrial product design I needed to choose an appropriate object that would serve as a good vehicle for that exploration. Not wanting to get lost or bogged down in unnecessary parts or geometry the primary requirements for that product is that it must be simple in shape and form, allowing me to focus on the process rather than the minutia of detail. With this simple criteria in mind I went to working on listing and mind-mapping until I narrowed in on the humble kitchen whisk.


Research the Product —In this phase of the design process I will be looking at the history, milestones of development and the current market allowing me to gain a better understanding of what I will be designing. Following is a summary of this process when looking at the whisk.

A old and faded photograph od Lydia Child reading a book

The earliest reference to the whisk dates back to the late 18th century recipe book written by Lydia Child, “The Frugal Housewife”.

The modern whisk that we know today emerged and was popularized in 1964, introduced by Julia Child on her cooking show the “French Chef”. The whisk has essentially stayed the same ever since. Contemporary whisk design while having handles designed for ergonomics and comfort —as can be seen in the designs of OXO, are still almost exclusively static and manual. The exceptions to this come in the form of attachments for immersion blenders and standing mixing stations such as the classic Kitchen Aid appliance. This innovation of design while offering power assistance, spins from the center acting more as a mixing device rather than a whisking device which is often a side to side oval motion. This distinction is vital to the desired whipping and aeration of the food stuff being processed by the whisking task.


Assumptions —this brainstorming session sets out to list everything that is already assumed to be known about the product being developed culminating into an insight into the product and the audience. The goal of this process is to put everything that you know in front of you creating paths of thought and exploration from these known factors. In the case of the whisk I know that it is a hand held device. I know that it is a kitchen utensil used for cooking, I know it has a handle and wires that form the balloon, I know that in my lifetime it has allays been the same, I know from my experience with the tool is it is tiresome to use even becoming uncomfortable or painful over use in long durations. Taking these assumptions forward helps me to craft the questions for the users about their experience with the product, do they have the same or similar experiences, is there a pattern?


Understanding the needs —this primary research portion of the design process is where we find our empathy insight. Learning about what is working , what isn’t working, the pains that the user is experiencing with the existing product. This can be accomplished through, observation, survey or interview. Coupling the insights garnered from this research phase with the assumptions of the previous phase hopefully lead to an insight on how the product can be improved for the end user.


I sent out a 👉survey via social media asking for peoples experience with the whisking task. In particular I wanted to understand the experience of people with limited mobility due to age, ailment or injury. I learned that while over half of those surveyed say they have limited mobility and over 62% say they experienced pain or discomfort while engaged in the whisking task only 12% said they have avoided a recipe because of the whisking task.

A screenshot of the whisk survey showing to pie charts that explain the afore mentioned data.

Secondly in my research I wanted to consciously experience the task for myself, recording a 👉video for observational playback, I set a timer for 10 minutes —the outter edge of time required to whisk from recipe, and went to whisking. After just over a minute I could feel tension building in my wrist, arm and shoulder. I would considerer myself a healthy person and I do not experience mobility issues. and for me by the end of the experiment I was breathing through the strain.

A screenshot of the whisk survey showing to pie charts that explain the afore mentioned data.

The insight to this research is as follows;

A. Though it seems like a simple task, in just a short ammount of time whisking becomes exhausting, uncomfortable and even somewhat painful.

B. Though the task is at a minimum uncomfortable and sometimes painful, people almost allways do it anyways.


The best way to help people within my audience to engage in this fundamental cooking task is to design a product that features powers assistance to reduce the required movement, and ergonomic design for comfort and the reduction of muscle tension and fatigue during the whisking task. The benefits of these design innovations will allow people the freedom to engage in cooking for occupation, chore and pleasure.


The Whisk Project Brief

With the insights that I have garnered to this point through research and the brainstorming of assumptions I now have a good idea of what the product is, who it is for and what needs I am addressing for that audience. Below is this information presented in a simple design brief that I can easily return to check my progress and assure that I am accomplishing the required goals and outcomes.


 Product:  Power Assist Ergonomic Whisk
 Project Must:
  • use 10 principle of good design
  • use human centered design
  • use affordances
  • use signifiers
  • use conceptual models
  • remain as simple as possible
  • have ergonomic design
  • have adjustable design
  • have ambidextrous design
  • have power assist design
  • explore through sketching
  • prototype concepts
  • create illustrated rendering of progressive quality
 Product Description:  A hand held power assisted whisk for whipping and aerating food product.
 Benefit Proposition:  Relives or reduces strain in the shoulder arm and wrist often experienced while engaged in a whisking task.
 Primary Audience:  People with mobility issues due to age, injury or other ailment who want freedom to engage this cooking task.
 Secondary Audience:  Kitchen and cooking enthusiasts. Casual consumer. Light-duty culinary professional.

Materials

A quick note on materials, though it is out the scope of this project. the lifecycle of products is an important consideration and I wanted to take a moment to mention that there are great advances in bio-plastics, such as hemp-based plastic and Mirel a bio-plastic that can compost in just 40 days. As an injection mold capable substance Mirel has good potential in large-scale manufacturing.

A screenshot of the whisk survey showing to pie charts that explain the afore mentioned data.


Research Resources

Below are some curated resouces that I've found very useful in my exploration of Industrial Product Design and illustration pratice.


Books:

Don Norman: The Design of Everyday Things Karl T. Ulrich & Steven D. Eppinger: Product Design and Development

Web Pages:

Nielsen Norman Group: Design Thinking 101 IDEO.ORG: Design Kit Interaction Design Foundation: Dieter Rams: 10 Timeless Commandments for Good Design


sketches of potential ideas for a whisk product

Sketching

4 minute read-time

Sketching for industrial product design is not quite the same as other types of drawing such as say drawing for an illustration. The main idea and priority when sketching for product design is to get the ideas on paper. It is essential to let the sketching flow unobstructed not being concerned with neatness, or accuracy or where they land on the paper. Slowing down too much for such considerations can hamper the flow of ideas and ideas initially are all we are interested in. The tools are very simple, and inexpensive, ballpoint pen(s) —you are going to go through a few, cheap printer paper —you are going to go through a lot, and some alcohol-based markers —Copic markers seem to be the standard but you can find some much less expensive alternatives to play with while you are learning to use them.


The Cover of How to to draw by Robert Scott
The cover of How to Draw what you see by Rudy DeReyna

For this exploration case study, I wanted to start at the beginning of the beginning, and that means learning the rudiments of mark-making, drawing ellipsis, drawing boxes and squares and cylinders in perspective, and isometric and orthographic drawing approaches. To do this I primarily worked through “How to Draw: Drawing and Sketching Objects and Environments from Your Imagination” by Scott Robertson and “How to Draw What You See” by Rudy DeReyna. I found these books to be on the opposite ends of a spectrum of density and approachability. While DeReyna’s book is very approachable and consumable covering the practice of observational drawing and building drawings from primitive shapes. Robertson’s book is very dense and comprehensive almost overwhelming, covering everything you could want to know about sketching from basic mark-making, perspective to rendering techniques and advice. I found the books very complimentary of each other. Finally, I also supplemented both these books with YouTube tutorials. There are a lot of these available of varying authority, but, if you watch enough of them you begin to see content themes emerge, information that is repeated by all, and I found that this the information that I wanted to pay attention to and practice.

an image of sketches


The Adobe Photoshop logo
The Autodesk logo

Photoshop: For final rendering and illustration, this is for me is the go-to program. Being efficient and knowledgeable with this program makes creating illustraion and graphics fun and intuitive.


Autodesk Sketchbook: is a pretty amazing and free raster based program and seems to be a go-to for most of the people I have looked at in sketching tutorials. The layout of Sketchbook is quite different from Photoshop and took some getting used to, so if you are coming from Adobe there is an adjustment. One of the greatest features of Sketchbook is its perspective tool, which lets you draw in one, two, and three-point perspective, this tool directly related to Industrial Product Design Sketching.


Autodesk Fusion 360: This CAD program is simplified and user friendly. Autodesk has done a great job with the user experience it is easy to understand and learn, however, its technical natured learning curve was difficult for in the time I had in this project. Should I want to become proficient itwould require a fairly large investment of time to learn any functional level of efficiency. Fusion 360 is a one-stop for production-ready technical drawing and much more.


Project sketches:

With my project criteria in mind —the whisk must be ergonomic power-assisted and ambidextrous, I began to sketch playing with form and function. Once I had the ideas down I highlighted the most promising with an alcohol marker, moving these sketches forward for more exploration and refinement until I achieved a clear idea of how the whisk looked and functioned. From this point, I will take the sketches forward as a reference testing my assumptions in prototyping and modeling.


sketches of potential ideas for a whisk product


Sketching Resources

Below are some curated resouces that I've found very useful in my exploration of Industrial Product Design and Illustration in general drawing and illustration pratice.


Tutorials:

Robert Laszlo Kiss: Sketching For Product Design Modern Day James: Sketching For Product Design Scott Robertson: Sketching For Product Design

Books:

Scott Robertson: How To Draw: Drawing And Sketching Objects And Environments From Your Imagination Rudy De Reyna: How to Draw What You See Koos Eissen: Sketching: Drawing Techniques for Product Designers


An image oseveral attempts acreating a whisk prototype and mode

Prototyping

4 minute read-time

In this phase of the project, I am testing my assumptions about the whisk design. Using the IDEO rapid prototyping approach and creating a well-rendered model example that can be seen and felt in the hand. The purpose of both of these proof of concept activities is to take the concept off of the paper, testing both form and function. The goal of the phase of the design is to illuminate the areas of the design that is not quite working. Allowing the designer to target adjustments where needed. This process may be repeated as many times as necessary to work out the design flaws and bugs.


Once I had discovered the form through sketch it was time to test my ideas through rapid prototyping. Using inexpensive materials that can be put together quickly. In this case popsicle sticks styrofoam, heavy construction paper, and then in the second round a Mini Electric 1.5-3V 24000RPM DC Motor kit built into a popsicle stick frame attached together with a glue gun.


What I learned from this prototyping exercise is;

(1) the ergonomic and ambidextrous concepts are sound.


(2) that the offset whisk attachment designed to create a wiping motion creates quite a bit of wobbliness while in use, and a counterbalance weight will be required for smooth oscillation of the whisk head.


In a real-world project, I would likely return to the drawing board and work out the sticking points, perhaps seeking the advice of an engineer, for this hypothetical case study I learned what needs to feel confident about moving forward in the project.


an image of a whisk prototype

A model of the ergo whisk on a stainlesss

This was a very extensive process of discovering how to work with materials and tools. Using sandpaper as my primary tool, I tried a variety of styrofoam materials from large bead packing foam —I do not suggest this material for small models that have details as this foam is rather delicate and easy to pull away more material than intended, to the smaller and more dense bead —this material handled the sandpaper forming surprisingly well. Next, I experimented with foam board, which is light, and once you learn some scoring techniques effective for make a variety of primitive forms such as boxes and cylinders. I deal with quick prototypes or rudimentary models. I did not think that I would be able to achieve the final plastic-like finish I was going for with this method so I moved on.


Materials

I used polystyrene sculpture block foam. This material is very dense and accepts filing and sanding well, which is why it is used for sculpture. Once I had the form of the body shaped I applied a few coats of Mod Podge hard coat, followed by a series of primering and sanding until I achieved a smooth even surface. This process was completed with a few coats of the final red spray paint. For the button, I wanted to keep the texture so I skipped the primer and painted the hardened foam with black acrylic. The modeling phase may have been the most interesting and enjoyable part of the project, It was very interesting to bring a two-dimensional idea forward into a three-dimensional representation that can be held, turned, and inspected.


The Cover of How to to draw by Robert Scott
The cover of How to Draw what you see by Rudy DeReyna


Whisk Model Photographs

A model of the ergo whisk on a stainlesss
Holding the ergo whisk model in the extended verticle position.
Holding the ergo whisk in the folded position


Resources

Below are some curated resouces that I've found very useful in my prototyping and modeling exploration of Industrial Product Design.


Tutorials:

IDEO: Rapid Prototyping and Much More Autodesk Fusion: Getting Started for Absolute Beginners Product Tank: Modeling for Product Design Rian Touag: Modeling for Product Design

Books:

Bjarki Hallgrimsson: Prototyping and Modelmaking for Product Design


A digital illustration created in Adobe Dimension of the ergo-power-assist-whisk in both extended and folded positions.

Rendering

5 minute read-time

The rendering of high-quality illustrations is the last phase of the project that I will be looking at, and for me with my background and experience with digital illustration rendering was the most familiar and comfortable in this design workflow process. The purpose of the illustration is to create presentation-ready concept illustrations. These illustrations will hopefully convince your team or client of the validity of the concept moving the project forward to develop and work out further technical considerations ultimately being sent on to manufacturing production and marketing. Alternately, it is also at this point that the project could be sent back for further concept refinement or scrapped outright. For some great information on learning to illustrate check out Andrew Loomis, he is in my opinion the absolute authority on the subject. A link to his book "Creative Illustration" can be found below.


A digital illustration of the ergonomic whisk in 3 positions. Docked on a charging base, folded, and vertically extended.

Moving from pen sketches into a digital realm is the fun part for me. But I still as always have plenty to learn. The goal for the illustration of the project is to create an idealized rendition of the product that highlights its potential.

What did I want to accomplish or learn from doing this exercise? While I am pretty good with photoshop and fairly okay at illustration rendering for Industrial Product Design is discipline-specific. Because it is industry-specific I need to understand and implement some professional practices or habits that others who have found success in the industry employ. To do this I went to YouTube and started watching tutorials. Tutorials on YouTube can be kind of a sketchy thing, there are varying levels of experience and expertise, but, what I have found is if you spend enough time watching tutorials from a variety of creators a couple of things happen, certain themes emerge across the board —this is the information to pay attention too, and the higher quality experts in the subject set themselves apart allowing you to hone in on the good information. I have included links to the creator channels that I found helpful in the resources section. Some key areas that are important focus on, creating forms in perspective, adding in the important details, this is, after all, a rendering of what will hopefully be a real object, adding texture —this helps sell the illustration and adding lighting —which helps to sell the volume and weight of the object in its environment.


Programs I tried: While I am most comfortable with Photoshop, I tried a few other programs as well. In my tut experience, people seem to work in Autodesk Sketchbook quite a bit. I like Autodesk Sketchbook, the best thing about it is, it’s free. A link to get this great program in the resources section below. Autodesk Sketchbook’s layout is pretty straightforward and easy to learn to allow you to get up and working fairly quickly. It has some very useful tools that are very helpful to Industrial Product design, these include the symmetry tool which allows mirroring of your drawing. This is very helpful when drawing items that need to be identical on both sides. Autodesk also has great real feeling paint materials that allow you to get very expressive with your art. The strongest tool for me of Autodesk Sketch that is missing in other programs is its perspective tool. This is an amazing and powerful tool that allows you to draw in one, two, and three-point perspective removing a lot of measuring and guessing. The biggest weakness of Autodesk Sketch is that it lacks masking in the layers' palette, while people have found workarounds this makes creating photo-real rendering clunky and difficult. The good news is you can save your file as a .psd photoshop file and continue working on the project with what Photoshop does best. Robert Lasco Kiss has some very helpful tutorial content on working in Autodesk Sketchbook, the link is below.


a screen shot of Autodesk Fusion 360 workspace

Adobe Creative Cloud, has pretty much every type of program you would ever need in a creative occupation if they don’t I am sure they are working on it. Adobe the cloud-based programs and apps however are a premium that comes with a subscription fee. For this project, I used Photoshop and Dimension. I will speak a little about Adobe Dimension first. Dimension as the name suggests works in dimensional space, allowing the creation of 3-Dimensional objects that can be viewed and framed at any angle. This is very useful for posing an object. Dimension has primitive shapes in its library that can be combined but a limited ability to create complex shapes. Without an external 3D program like Maya or Blender to create the OBJ files, you are somewhat limited in what you can do in Dimension. Where I found it useful, and this is a theme throughout the process is using Dimension in tandem with Photoshop, creating an accurate perspective model as the base to build off of in Photoshop.


a screen shot of Autodesk Fusion 360 workspace

Finally, and I think this probably the most important is Autodesk Fusion 360. This free CAD (Computer-Aided Design) program has a very user-friendly interface and the program is incredibly powerful. With it, you can design 3 objects, animations, and technical drawings. Fusion 360 has for me a very steep learning curve with a large amount of technical information to absorb. To date at the time of this writing, I have not come anywhere near proficient with this program and only able to just begin to use it in the process for this project. But, tomorrow is a new day and with perseverance and willingness, there is not much we cannot accomplish.

a screen shot of Autodesk Fusion 360 workspace

The technical drawing is a communication tool, it communicates scale, dimension, space, and form as well other details such as material to be used and movement of parts. These specifications are read by engineers so that the product can be produced in manufacturing.


This drawing has the purpose of showing details of the product. To achieve the appropriate technical rendering, I referenced “Textbook of Engineering Drawing” by K. Venkata Reddy. Even with the reference material, I feel I may have pushed the expressiveness of the illustration a bit too far, sharing what may be unnecessary details. Overall I think this technical drawing is a good start in communicating the details of the product form in scale, form, and function. To achieve any level of proficiency would require much more practice, study, and guidance from a knowledgeable mentor or teacher.


 A tehnical drawing of the ergonomic whisk


Rendering Resources

Below are some curated resources that I've found very useful in my rendering exploration of Industrial Product Design illustration practice.pratice.


Tutorials:

Robert Lasco Kiss: Autodesk Sketchbook Graphic Wizardry: Digital Illustration for Product Design Ashley Cameron: Working With .OBJ 3D Obects Sinix Design: General Illustraion Marco Bucci: General Illustration Lars Christensen: Fusion 360

Books:

Andrew Loomis: Creative Illustration Textbook of Engineering Drawing

Programs:

Autodesk Sketchbook Autodesk Fusion 360 Adobe Creative Cloud Blender 3D


Facebook Instagram YouTube